Press the Air Out — How to Walk a Vibration Machine
Press the Air Out — How to Walk a Vibration Machine
A hollow-sounding tile is a tile with air under it. The machine is the easy part. The walk pattern is what makes the bed solid.
Every tiler knows that sound. You tap a tile that looks perfect — thud, thud… hollow. The adhesive is there, the tile is flat, but air is sitting between the tile and the bed.
A vibration machine exists to push that air out. It has one job, and how you move it decides whether the job gets done.
01Start in the middle
Put the machine at the centre of the tile, not at an edge. The middle of the bed is the deepest part — and the farthest point from every exit. Push from the centre and the air has four ways out at once.
Start at an edge instead, and you seal the border first. The air in the middle gets trapped.
02Walk out, and overlap
From the centre, travel to the edges in passes that overlap. Two habits do most of the work:
- Overlap every pass by about a third of the cup. One pass is a line. Overlapped passes are a field.
- Slow down at the edges. The last pass along each side is the air's final exit — give it time, light pressure.
03You're done when the edge shows mortar
No timer, no formula. Watch the joints and the edges: when a thin line of mortar rises evenly all the way around the tile, the air has left the bed. That's your stop signal.
Two sides rising, two sides dry? The dry sides are your future hollow spots.
And if nothing rises anywhere, the mortar has already started to set. More vibration won't fix that — it just moves a stiff bed around. Work with fresh mortar, or relay the tile.
04Three habits that leave hollow spots
Parking in one spot
Staying on one point pushes mortar away from it — that spot can end up emptier than the rest. Keep the machine moving.
Only doing the middle
The centre gets all the attention, the last stretch along the walls gets none. On big tiles, the edges are exactly where hollow spots show up.
One speed from start to finish
Start gentle and let the tile settle. Turn it up for the main passes. "Gentle first, full later" matters more than any level number.
05What it's not for
A vibration machine finishes a fresh bed. It won't rescue a tile that has already set in the wrong place — vibrating it again just works mortar into the joints and makes the mistake harder to fix.
Levelling and closing joints belong to the levelling kit. The machine's job ends when the mortar line shows evenly all around.
06Pick your machine
| Model | Cup | Battery | Levels | Best for |
|---|---|---|---|---|
| P01-01 | 120 mm | 12 V · 2,000 mAh | 6 | Standard wall and floor tiles |
| P02-02 | 140 mm | 16 V · 2,000 mAh | 9 | Everyday mid-size tiles |
| P02-01 | 190 mm | 20 V · 2,000 mAh | 12 | Large slabs, heavy daily use |
| P03-01 | 190 mm | 20 V · 1,500 mAh | 6 | Quick jobs and repairs |
Cup size, battery and levels all step up together — one logic from a wall-tile crew to a slab crew.
Walk it right, and every tile answers with a thud
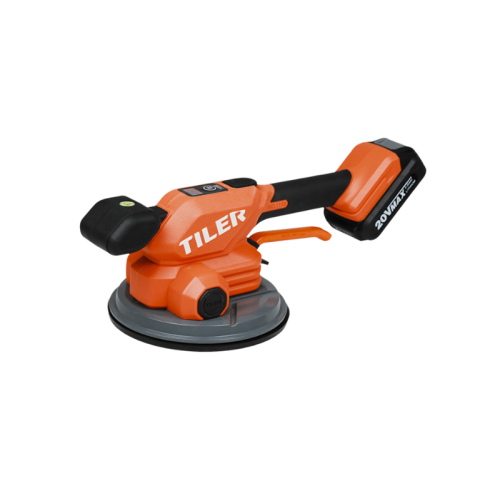
TILER's vibration machines and suction cups cover the whole path — from carrying the slab to seating it solid.
Sources
All machine specifications from TILER product pages — tilertool.com, Tile Carrying & Laying Tools.